J&RS's Refitted Trim-Only Carpentry Trailer
RIG DETAILS
| USED FOR | Carpentry |
| TYPICAL JOBS | trim carpentry |
| BODY | Enclosed Trailer, V-Nose |
ORGANIZATION

Matt Ward is the lead trim carpenter for JR&S, a homebuilding and remodeling company in Duluth, MN. In order to increase efficiency, he rebuilt the interior of the company's trim trailer. Speed of the build was prioritized along with the goal of creating a practical layout that would make the trim carpenter team more effective.
See More:

The Trailer
The trailer is 8 1/2' wide, 8' tall and has a ramp door. Since the trailer only needs to handle trim work, it doesn't need to be jammed with tools and storage, and the design can be simpler than a typical contractor trailer.
A benefit of this is that the trailer is still has lots of room inside, which makes it easy to reconfigure in the future.
Another thing to note is that if you're a do-it-all renovator, you can cut down on your tools and inventory by instead specializing in a segment of your trade. This can make your day-to-day easier and potentially more profitable if you can charge specialist rates.
At the Back
There are dedicated, easy-to-reach slots for the levels, track saw tracks, and Ron Paulk work table at the back of the trailer. The slot storage protects levels and tracks from damage and ensures that they have dedicated locations rather than just being tossed on a shelf.
Many contractors locate saw tracks on the tops of shelves or clamped to the ceiling, but for a trim or carpentry trailer where tracks are very regularly used, this kind of dedicated space is a great idea.
There are only two ladders on the tool trailer, a four foot and a six foot - no other ladders are necessary. Again, this is a result of the trailer being for trim only, so the set of ladders needed to complete a particular job is greatly reduced. We shed real tears for the commercial/residential HVAC techs and plumbers that end up carrying four or five different ladders on an Express because they're expected to do it all.
Shelf Setup
There are three types of shelf on this trailer:
- Adjustable-width slotted shelves
- Large flat-bottomed cubbies
- Slanted organizer
Large Tool Storage
The table saw, chop saw, air compressor, and vacuum have dedicated large cubbies. Many times we see cubbies and shelves that are slanted back to keep tools, boxes, or bins in place.
These cubbies aren't slanted and use bungie cords as a safeguard to keep the tools on the shelf while driving. For larger tools it can be a lot easier to keep the shelf flat. These tools are heavy and having to heft them at an upward angle is the sort of thing that can take its toll on your body.
Organizer Storage
A floor to ceiling shelf holds several DeWalt organizers. These shelves are tilted so that the organizers don't need tie-downs to stay in place for transport. By eliminating tie-downs, they save the time that would be required to take them off and put them on.
Tie-downs might seem like a small annoyance, but they create a repetitive task that you do over and over and over again. Get rid of them if you can.
Air and Power Tool Storage
Ron Paulk-style storage is used for storing the trim trailer's air and power tools. Each tool gets its own cubby, and cubbies can be resized if the crew wants to rearrange tools.
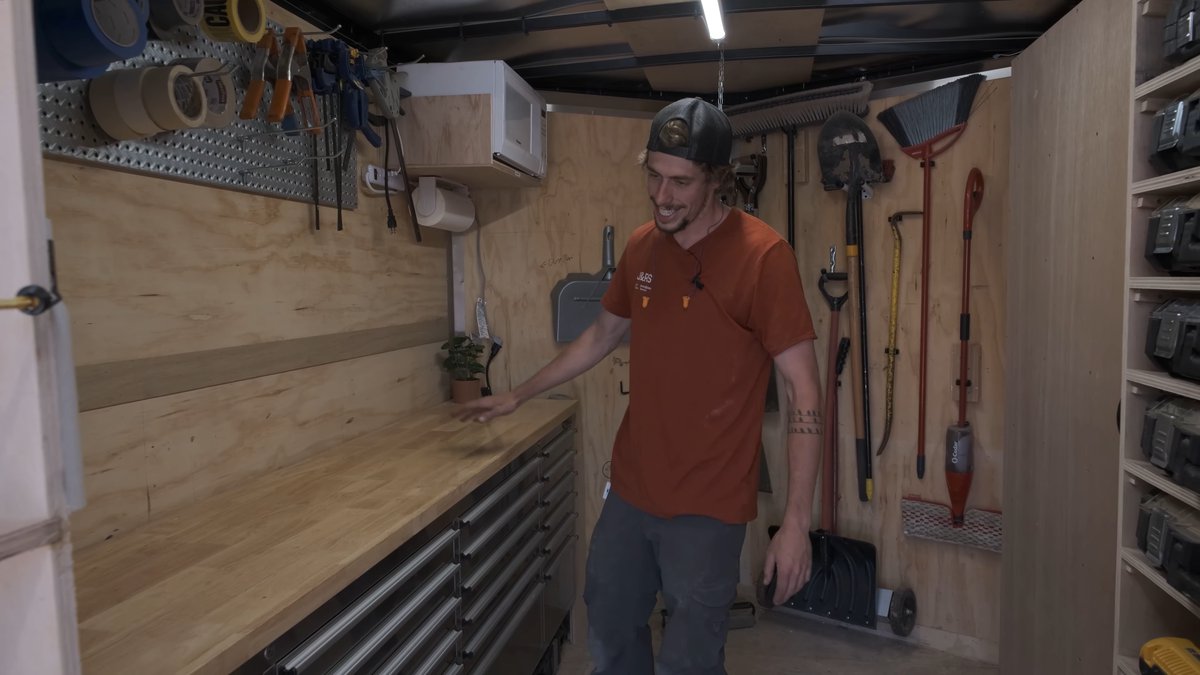
Quick Drawers With an 8' Mechanic's Tool Box
Matt says the 8' Grizzly tool box that they installed is "a game-changer". Previously the trailer had wooden drawers that they used for tool storage. However, the drawers were too large, difficult to keep organized, and hard to open.
The Grizzly tool box has smaller, more numerous drawers, is easier to open, and, best of all, just needed to be bolted in place!
It's worth pointing out that many carpenters and renovators like to build their own plywood drawers. This will hopefully get them a setup that is exactly matched to their needs. However, drawers take a significant amount of time and effort to build. If you need drawers, consider using a pre-built tool box instead of building them yourself.
The Fastener Door
The side cargo door on the trim trailer wasn't used much. In fact, they didn't even have the key for it!
Because they still want to be able to use the door, but don't plan to use it much, Matt came up with an idea:
To build a hinged shelf unit for fasteners in front of the side door.
The shelf unit covers the entire side cargo door with the fastener storage facing the door. If the side door is opened, fasteners are easily accessed since the shelf unit faces out. If the side door is kept closed, the shelf unit swings on hinges toward the center of the trailer to make the fastener storage accessible.
A side benefit of this type of mobile storage is that the inward face for the shelf can still be used for more storage in the future. This is a great place for levels, squares, or even organizers that are attached with a wall mount.
If side access isn't essential, blocking a cargo door is a great way to bring the inside of your trailer outside. Also see a similar idea on Shawn's carpentry trailer for making a full-height shelf that swings on the floor.
Battery Charging Setup
In the trim trailer, Matt put all the charged DeWalt batteries right at the back where they can easily be grabbed. Empty batteries are located up in the front of the trailer so that they don't mix.
Many tool trailer builders have come up with simple methods like this to keep charged and discharged batteries separate since this saves you the time of having to check whether the battery you just picked up is charged or empty.
This is even better when you have a lot of batteries to keep track of or you have a large crew. You don't want your crew members to be trying out batteries every time they need a new one - that's a repetitive task that can be eliminated.
Conclusion
Compared to a typical contractor's tool trailer build, this is a very simple example of what you need for a single purpose trailer. If you're a do-it-all type of contractor, this kind of build can create a real temptation to narrow the scope of services you offer.
Because of the simplicity, this is also a pretty quick build. Using a pre-made pegboard and mechanic's tool box are two great examples of speeding up your build with a little money.
If you're having trouble justifying an expensive item, consider how much money you lose by spending time building it instead of doing a job.
Get work trucks and tips in your mailbox.
Your time is precious. We write about organization, tools, and techniques that make tradespeople work faster and more efficiently. Subscribe to get our articles and tips in your inbox.
We will not spam you.